How to write image file to the tablet, interactive display or conference displays you bought from us.
You can rewrite the image file if the unit is dead, screen black or other problems, please kindly be told that you will erase all of your data by doing this. Below is the instruction of how to rewrite image files,
It need 3 things
-Factory tool which you can download from this link, https://drive.google.com/file/d/1o8aOo9O8RsxvNFTll7MOV0J7qdon6mud/view?usp=sharing
-Driver which you can download here, https://drive.google.com/file/d/1GCE4C4SueV7aKLwxxvmFZtfuZv85MMF1/view?usp=share_link
-The image file/FW, which will be difference upon different models, please contact the sales for the matching image file.
After you got all these things, then follow the steps below,
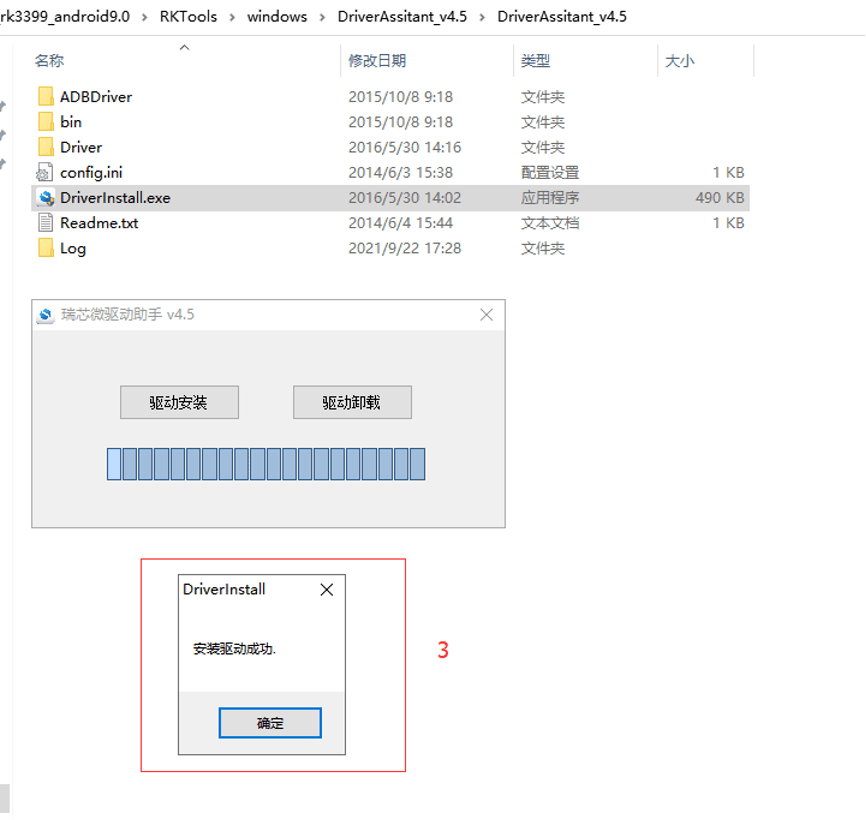
1-First install the driver on the windows OSD computer, as shown in the figure below, after prompting that the installation is successful, you need to restart the window computer once.
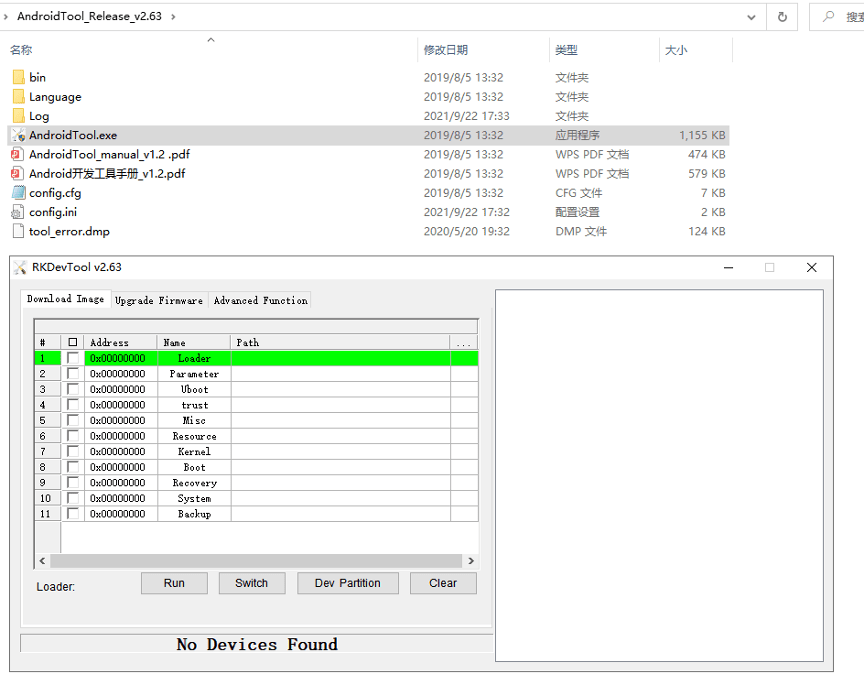
- Open the upgrade tool, this tool does not need to be installed, you can use it by opening AndroidTool.exe, as shown below


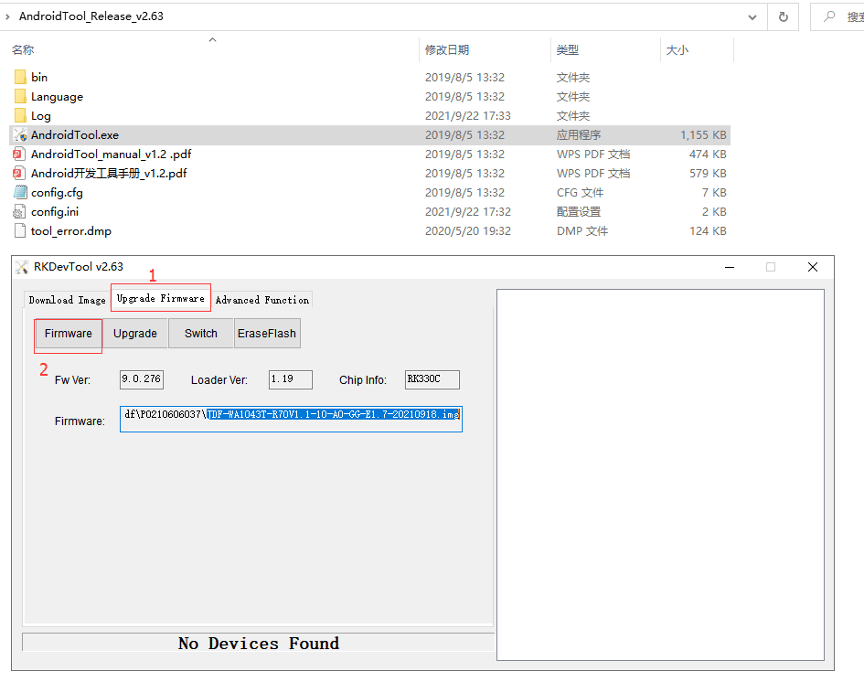
3.Select the firmware to upgrade, as shown in the figure below, first Choose firmware upgrade from the tool and then choose the image file from wherever you saved it in your computer.

- Upgrade: Use micro usb cable to connect the OTG port of the machine and the usb port of the windows OSD computer. It will then show a LOADER DEVICE in the button of the tool where it says No device found in the last image.
If the device is not working normally, you can choose to force the upgrade by following below steps.
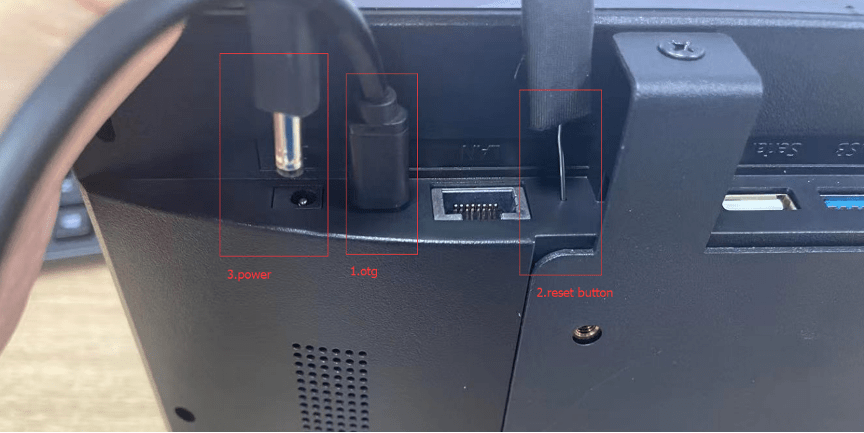
Use a pin to press the reset button without releasing it, and then plug in the power supply for about three seconds. In the AndroidTool tool, you can see that a loader device is found, and then release the reset button, as shown below.


- When the above steps are completed, click Upgrade to update the firmware and wait for the download to complete, as shown in the figure below

- If step 4 confirms that the operation is normal, but no device is found in the AndroidTool tool, we recommend changing to a micro usb cable.
For cross-system upgrades, such as the current Android 8.1 version of the machine, when you need to upgrade to the Android 10.0 version, you need to click Erase and then upgrade after switching.
Here is a link for the demo video,